Wednesday 31 December 2014

APC Challenge - Week 16

Wow!  Today is 31st December which means in just a few short hours, it will be 

2015
It is lovely to reflect on the year that is finishing,
but it is also exciting to look forward to what is to come!
  
 So, for my last post of 2015, I am playing along with the 
Altered Playing Card Challenge
Week 16


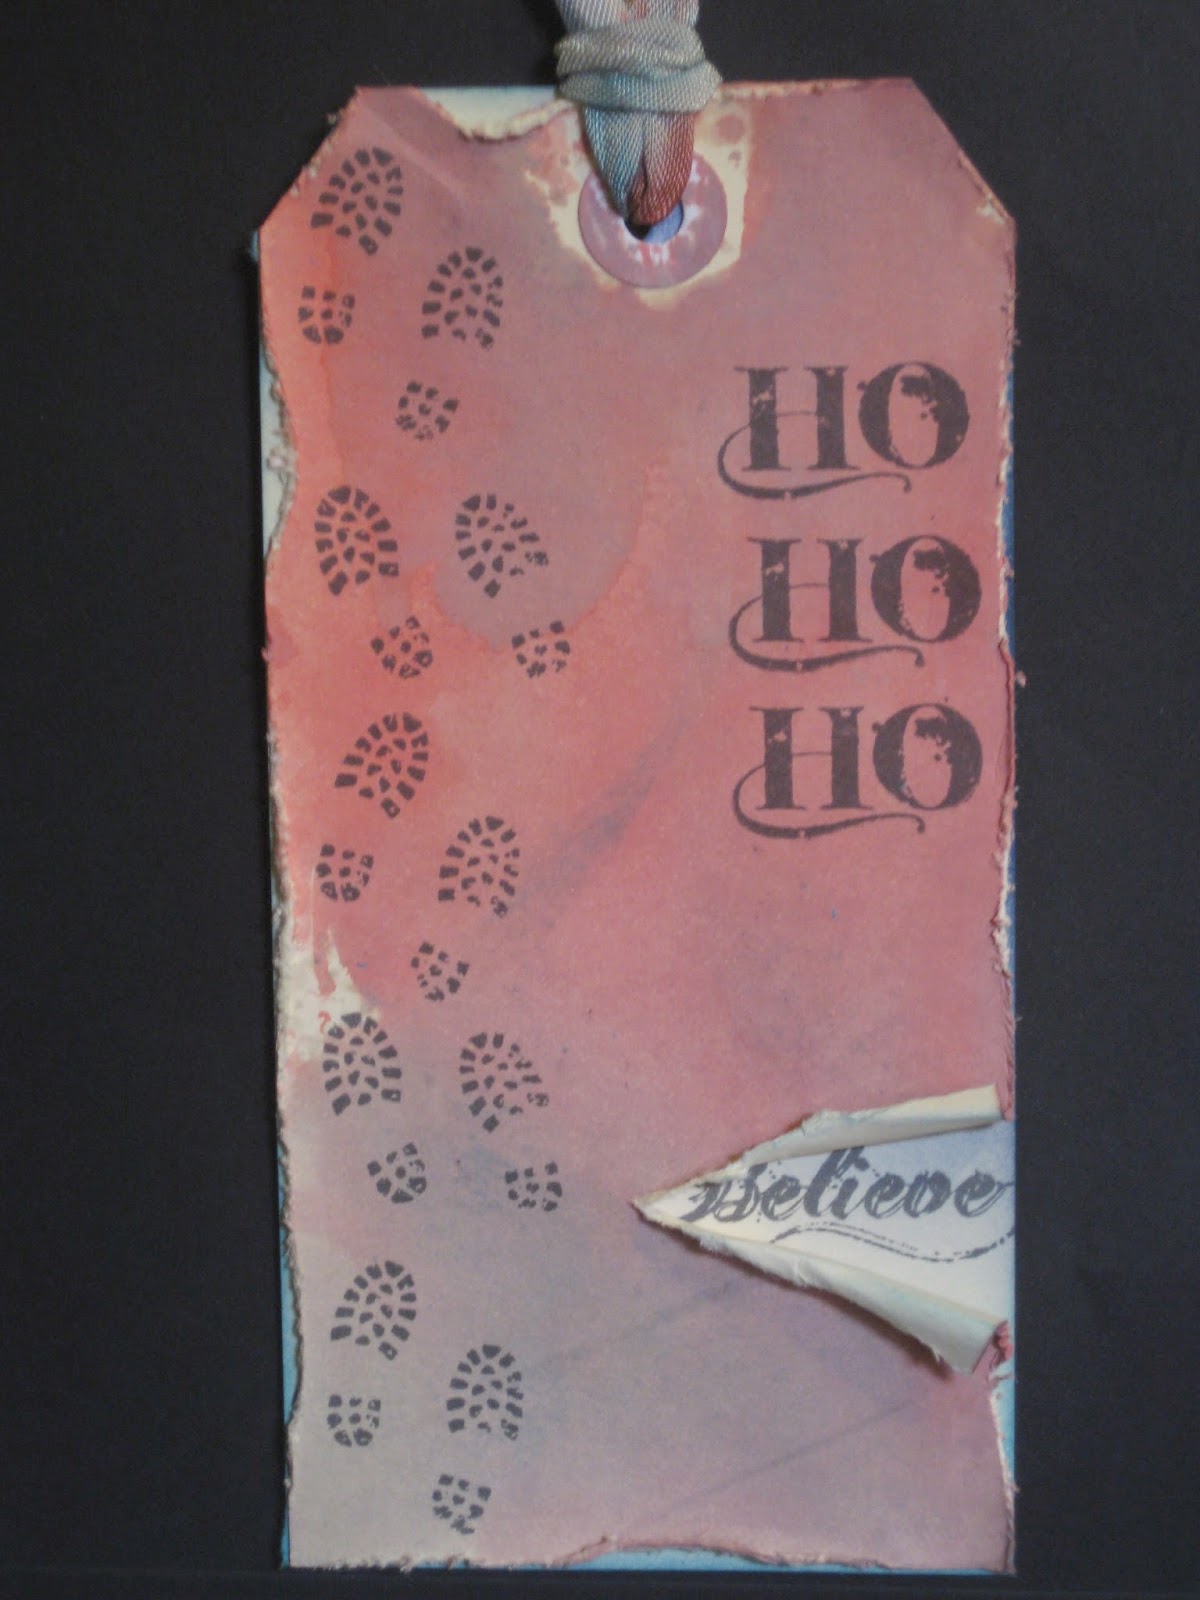
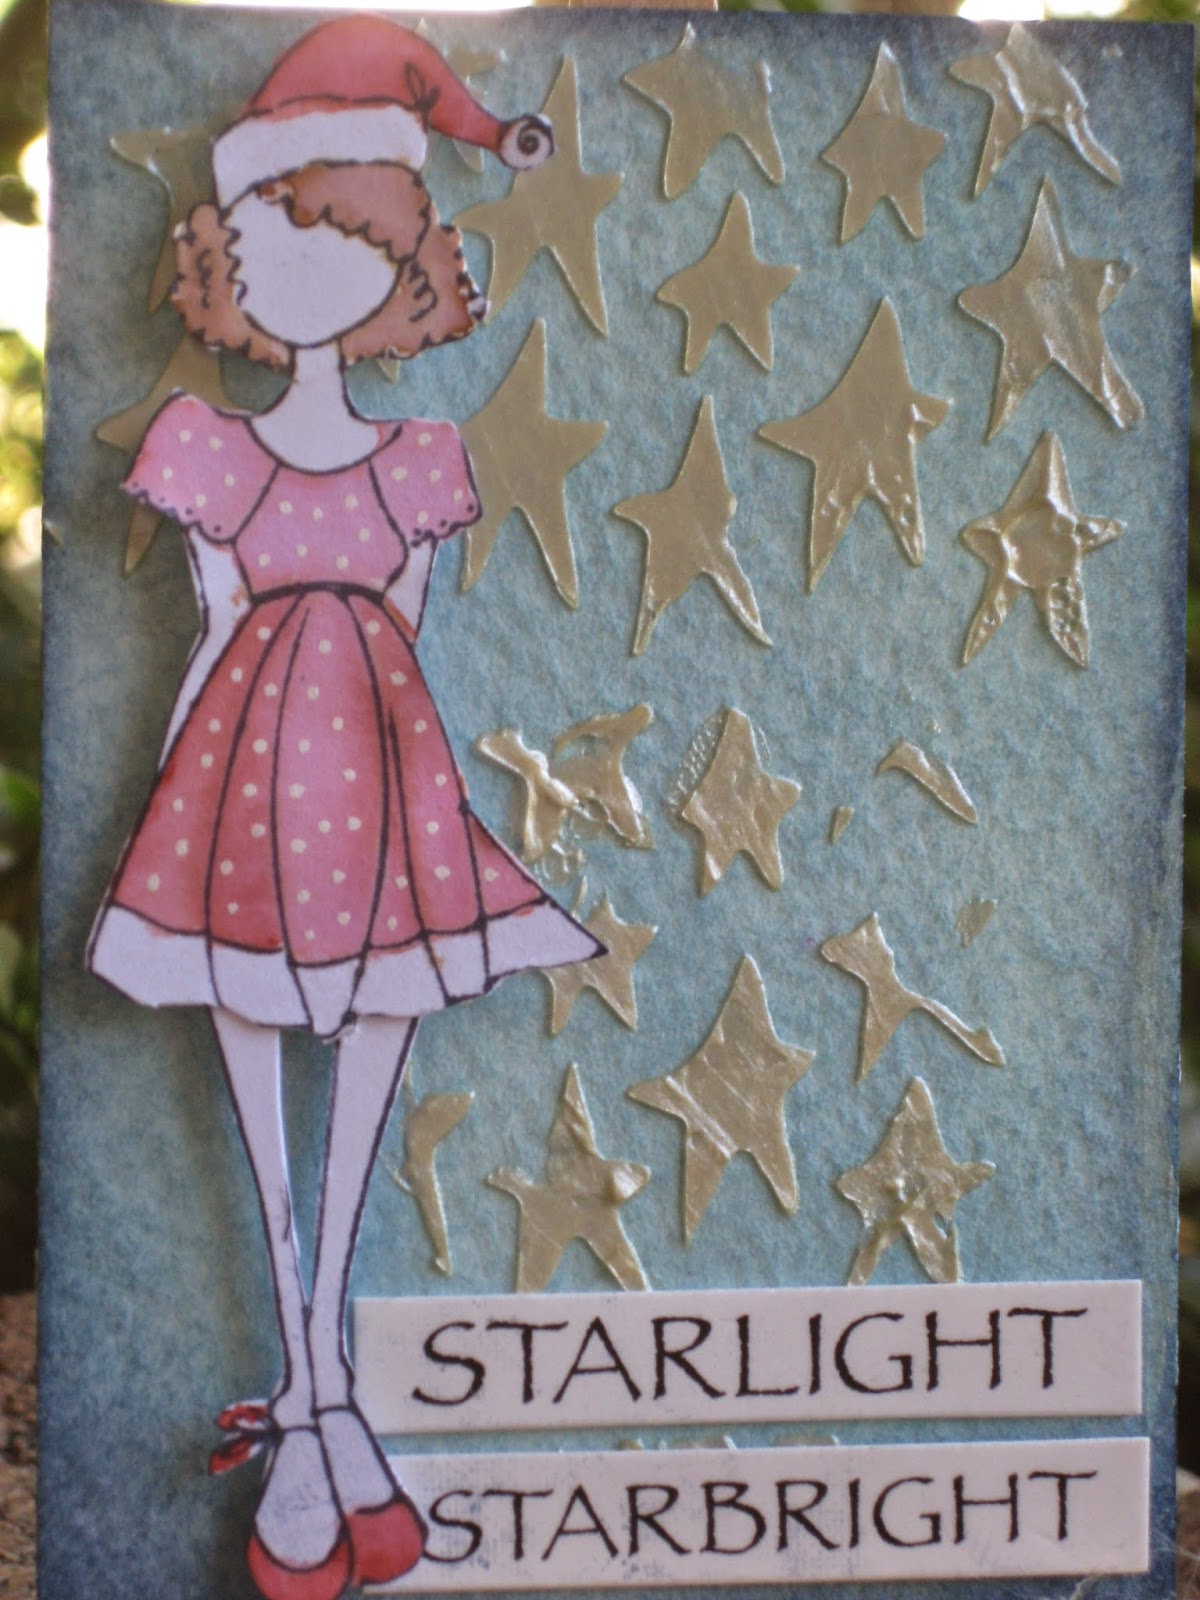
The background for both cards was to start with a layer of paint and while it was wet, crumple some tissue paper and stick it down on the paint.  Once it is dry, cut off the excess tissue.


Stamp an image, add some words, and it's all finished.


I also lightly sponged some 'black soot' Distress Ink around the edges.

These cards will also be my entry in the current
where 'anything goes'

I will be back in the New Year to show Weeks 14 & 15, so be sure to come back!

HAPPY NEW YEAR

and may it be a crafty one!

Happy Crafting!!!


Wednesday 24 December 2014

Happy Christmas!

Ok, so yesterday I said I'd be back with a twist on some Christmas crackers.

For those of you 'in the know' my DH has been a Doctor Who fan since before I met him, so with a little bit of looking on 'the net', he came up with these crackers with a difference.
 
 
So we printed them out, cut and folded along the lines indicated, added some curling ribbon, and there you have it, Doctor Who bonbons!


I wonder what might be inside ...... hmmm?
 
 
Merry Christmas
 
and a
 
Crafty New Year!


Tuesday 23 December 2014

Crackers Anyone?

We got together with our good friends on the coast last Saturday, to celebrate Christmas with a yummy lunch followed by opening presents.
Of course lunch wouldn't be the same if there were no crackers to pull, containing paper party hats, silly jokes and a token gift.

Except, this year it was handmade crackers with my DH coming up with the jokes.


I cheated slightly, [gasp, how could I?] and bought two packs of crackers, one a shimmery white and the other silver, but in doing so the hats were already made.  To jazz them up a bit I decided I would stamp some sprigs of holly on them, with just a touch of colour.  I spread them out flat allowing plenty of time to dry on the coated surface.  So far, so good!


I stuck the snap on the inside, rolled the crackers, popped the tabs into place and tied one end with curling ribbon.  Next I added the hat, a token gift and DH's jokes and tied the other end.


Don't they look pretty?  But, if you look hard, what happened to the colour on the holly?  Hmmm ..... it had just about disappeared by the time we actually pulled them!
 
Oh well, they all popped, we laughed at the jokes and all enjoyed a lovely relaxing lunch together.

Tomorrow, I'll be back to show you the two ring-in crackers!

Happy Crafting!
 

Sunday 21 December 2014

Oh Christmas Tree

Do you remember the Christmas tree ATC I posted last week?  Well, I had already had a previous attempt at something very similar, except it was on a tag.  Silly me had got my challenges and themes muddled and so I only posted the ATC version.

This week at Tagalong however, the theme is
Oh Christmas Tree
so here is the original attempt at a pretty little tree.
 
 
The tree is from Darkroom Door "Yuletide" collection and is stamped in SU 'old olive' ink.  The 25th December is stamped using 'festive berries' Distress Marker to colour the letters.


Little touches of sparkle were added to the tree using 'lime green' Stickles and 'ruby red' Liquid Pearls were perfect for the baubles in the tree.

The bunting was in my stash and comes embossed in white, so by adding 'festive berries' and 'old olive' to alternate flags, the pattern emerges.


I have a roll of washi tape which has presents on it, so I carefully cut three of them out, and stuck them under the tree - the colours were a perfect match.

I lightly added colour around the edges of the tag with Distress Ink, and finished off with seam binding ribbon which was coloured to co-ordinate with the tag.

Happy Crafting!
 

Monday 15 December 2014

Reindeer or Two?

The theme for this weeks challenge at Tagalong is 
Reindeer
so, with that in mind, here is my creation.
 
 
I started with both dark and light blue pieces of textured cardstock cut to a tag.  The light blue card was torn into different size pieces to create the illusion of snowy hills.  I edged the torn edges with a little bit of Distress Ink to define the hills.

On the dark blue piece, the trees (Darkroom Door) were stamped in 'jet black' Archival Ink.

The reindeer is cut from a Cheery Lyn die called "Deer in Forest".

The tag is finished with a silver ribbon and Merry Christmas stickers.


The reindeer also has a little friend, as you can see on the card version of the tag.


Those antlers must be heavy to walk around with, hope he can find somewhere to rest his weary head LOL!!!
 
Happy Crafting!!!
 

Sunday 14 December 2014

WISH

Good morning, all you lovely people.  Hope you are enjoying your weekend whether it be crafting, Christmas shopping or spending time with loved ones.

The challenge at Wicked Wednesday this week is 
Happy Holidays
so with that in mind, this is my take on the theme.
 
 
The trees were inked up using Stampin' Up! "Old Olive" onto a watercolour ATC.  The words and the star also come in the same set of stamps from Darkroom Door "Yuletide Collection" vol 1.
These were inked up with a "festive berries" Distress Marker.   To add a border, just a touch of "worn lipstick" Distress Ink was lightly added to the edges.


The tree is decorated using "Lime Green" Stickles, "Ruby Red" Liquid Pearls and the star has a touch of "Picket Fence" Distress Stickles.

Happy Crafting!!!
 

Saturday 13 December 2014

Visible Image - Ho Ho Ho

I thought I'd play along with a challenge that
has running at the moment.
Each month Craft Stamper magazine includes a little stamp on the front of the magazine and the December issue was a set from Visible Image of "HO" , "Believe" and some "footprints".

This is my entry tag in the challenge.


I thought I'd go with a vintage look to my tag using 'barn door' and 'iced spruce' Distress Inks which when blended together, give a grungy, vintage look to the tag.

The stamps were inked up using Archival 'watering can' ink which is much better suited to the vintage look, then if I had used jet black.

I went around the edges with my distressing tool, tearing and rolling a section in which the word "believe" peeps through from below.


I adhered this tag to another of the same size which has just a touch of 'chipped sapphire' Distress Ink around the edges.  
The seam binding ribbon was dragged through 'barn door' and 'chipped sapphire' inks and spritzed with water to blend the colours together.  It was then looped through the tag.

Hope you like my tag using these cover stamps.

Happy Crafting!!!

Thursday 11 December 2014

APC Challenge - Week 13

Altered Playing Card Challenge
Week 13

This weeks challenge is all about 
BEES
so, I had a look through my stash of stamps and found only two bees, one small and one big!
But that is ok as there are only two playing cards anyway.

Come and see what all the buzz is about!


I started by squeezing a small blob of lime and gold acrylic paints onto my craft sheet, and using a little sponge, added colour to both cards.  The colour difference is because gold was added first on the left card while lime was added first on the right card.


  After the paint dried I added a torn piece of scrip tissue paper down the side and another smidgen of torn paper on the top left corner.  I then added Viva Croco Cracking Colour 'Metallic Silver' through a honeycomb stencil.  I've never used this product before, but it was in my mystery box from Darkroom Door so I thought I'd give it a try out.  Next I stamped off once the "bla bla bla" words from Stampotique for a bit more interest.

I've had this bee stamp in my stash for years and have always thought him quite fun.  I stamped him onto white cardstock, coloured him with yellow and orange Distress Markers and cut out just his body.  I then stamped him again directly onto the playing card and glued the cut image over the top.


I used 'Vintage Photo' Distress Ink through the honeycomb stencil on this card, and then tore a couple of pieces of tissue paper and glued them over the top.  I stamped "Bee Happy" onto white card, punched it out with a small over punch, coloured it with a yellow Distress Marker and squeezed a nice layer of Glossy Accents over the top, putting it aside from 24 hours to dry.  The Distress Marker bled a little under the Glossy Accents but I'm happy with the end result.  Once it was dry I popped it onto dimensionals to finish off the card.


Happy Crafting!!!

Tuesday 9 December 2014

Vintage Santa

I'm back again ........
 
As I mentioned in yesterday's post, I was having a lovely play making a variety of things for different challenges this week.
The theme for the Tagalong challenge this week is 
Vintage Santa


I started off with a manilla tag (not sure of the size) and coloured it using 'Barn Door' and 'Iced Spruce' Distress Inks.  I then spritzed it with water and let the colours dribble together a bit.    I then added just a tad more colour to brighten it up a little.

Next I pounced (ponced?) 'Barn Door' through a stencil for a bubble effect, stamped holly along the side using more 'Iced Spruce' (which looks a bit patchy) and in the top left corner.

To give a bit of dimension and glimmer, I used Viva Modellier Creme 'Mother of Pearl Champagne' through a stencil randomly in three places.

The words and picture of Santa on Horseback came from Darkroom Door word & picture strips that were in my 'mystery box' which arrived last week.  The two holly berries were stamped and coloured from Julie Nutting "Merry Nice" set, with a touch of Wink of Stella pen on the berries.

To finish off, I coloured the seam binding ribbon to match, tied it into a bow and attached it with a staple.

Gosh, I am on a roll this week; hopefully I'll be back tomorrow after I've made something for yet another challenge!
 
Happy Crafting!!!
 

Monday 8 December 2014

"Clarissa Claus"

It has been SO long since I participated in a challenge, but this afternoon I was determined to have a bit of a play so I could submit something!

So, for starters I decided to begin with the challenge at
whose theme this week is "You're a Star"


I started with a watercolour ATC and coloured it using 'Broken China' Distress Ink.  Next I added Viva Modellier Creme 'Mother of Pearl Champagne' though a Dylusions stencil to add the stars.  I found the words on a Darkroom Door 'wordstrip' which worked with the theme quite nicely.


'Clarissa Claus' (yes, I made that up, hehehe) is from a Julie Nutting set called "Merry Nice", and with ever so slightly shorter legs, fits perfectly on the ATC.  I coloured her with 'Barn Door' Distress Markers, blending the colour with a water brush and adding polka dots with my Posca pen.  Although you can't see it in the photo, the fur on the edge of her Santa hat and also on the edge of her dress is all shimmery, thanks to my new Wink of Stella pen (ooh, why haven't a bought one of these earlier?).
 
Before I popped 'Clarissa' on dimensionals, I went around the edge with 'Faded Jeans' Distress Ink to add a bit of depth ....... and with the words added, my ATC is finished.
It was really nice to play along with this challenge, so come back tomorrow to see what other challenges I am playing along with this week.
 
Happy Crafting!!!
 

Sunday 7 December 2014

Baubles & Music

So, still behind the times (but almost caught up) ........

Last Wednesday was the Friendship Service at church for the old folk who for various reasons are no longer able to get to regular services each week.   The Friendship Service is held on the first Wednesday each month and they normally have morning tea following.

Being December though, they are invited to stay for a lovely lunch with a bit of entertainment to follow.  Lunch is provided by a lovely team of ladies from our church who spoil us with a variety of salads, ham and chicken and a yummy mince pies for dessert.

My contribution to the lunch for the last few years, is to provide a small gift for each person.  This year my friend Gaye and myself, made Christmas Baubles.


Each bauble takes around an hour to make, although that doesn't include cutting the papers, and every one is different.  We put one on each place setting at the tables and they looked very festive with all their different colours.

After main course (and before dessert) we were treated to beautiful Christmas songs by an all female choir.
Think of a men's Barbershop Quartet, but with ladies instead!
They were absolutely magnificent!
 One of the choristers is a member of our church and she organised the entertainment.
  Afterwards, each of the ladies was also given one of the baubles as a thank you.

It was a really lovely day, enjoyed by everyone.

Happy Crafting!!!

Saturday 6 December 2014

Christmas comes in all colours!

Going back in time .......
..... a couple of weeks ago, I was going through all my papers putting together co-ordinated papercraft gift packs to donate to Anglicare's Christmas appeal.  I put in lots of papers and cardstock, with embellishments such as ribbons, bling, punched shapes etc and always make sure there are at least five cards and envelopes ready to go.  I package them in an A4 cellophane bag and attach a card topper.  There are lots of goodies to play with - much better value than a purchased kit!  The idea of these kits is twofold: firstly, someone will receive a lovely crafty gift at Christmas; and secondly, it helps me declutter some of my craft stuff, some of which is leftovers from classes and other projects.

Anyhow ........ I came across papers by Alison Ellis (discontinued) which had been used for a Christmas card class probably a couple of years back, and decided I would try to make this years cards from stuff that I already had in my stash rather than buy new goodies (yeah, like that worked, LOL!!!).
 
 
Now, I realise black, white & silver are not your usual Christmas colours, but these papers work very well together with the silver being either foil or glitter.  I quickly cut the papers to size, and cut around and popped onto dimensionals the feature embellishment, and "hey presto", finished cards!

I suppose I should count how many cards I need to send to friends and family this year, although I have a sneaky feeling I still need to make more!
 
Happy Crafting!!!
 

Friday 5 December 2014

Vintage Christmas Cards

This morning I joined the scrapbooking ladies at Alice in Paperland, although only two of them were actually scrapbooking; one lady was making book covers and I was making more Christmas cards.  It is very rare for me to scrapbook although it is something that I think I should do more often.


The background papers came from a 6" x 6" pad from Bo Bunny which was a recent freebie on the front of a card magazine.  Included in the freebie was also a christmas stamp set with which I stamped 'Happy Christmas' on the front of each card using 'jet black' Archival Ink.


The papers are all double sided and some seem to look better on white cardstock while others look better on ivory cardstock, so I made five of each.

The vintage santas on each card came from Darkroom Door, as part of a "mystery pack" which was delivered to me during the week.  

These cards were all very easy to put together, just cut the paper to size, ink around the edges in Distress Ink "spruce", add a narrow strip (also inked on the edges) and pop up santa on dimensionals.

Happy Crafting!
 

Thursday 4 December 2014

Deer, oh deer, oh deer!!!

Christmas is on its way!!!
The shops are decorated, there is Christmas music playing, the inevitable lists are being written, and very soon there will be money pouring out of my purse - eeeeekk!!!

In the midst of this, is the need to make start on my Christmas cards. 
 So, for starters, let me show you the first batch!


The background on these cards was made the same way as the ATCs in the previous post.  I edged the torn edges with Distress Ink, and stamped the trees from Darkroom Door in the background.

The deer die cut is from Cheery Lyn designs that I thought was rather gorgeous!  Each deer has slightly different antlers to each other, as they were a bit too high for the size card, so they were clipped to fit  (No deers were hurt during this process, hehehe!).

Even though in Sydney we are as far away from a cold, frosty scene as you could imagine, I wanted to do something just a little different this time.

Now, all I need to do is find what I did with these cards.  I obviously put them 'in a safe place', but where???  H E L P ...............
 
Happy Crafting!
 

Wednesday 3 December 2014

ATC Challenge - Christmas

As you would know from previous posts, I've been part of a Stampotique ATC swap over the last few months which has been lots of fun.  I send two ATCs to my allocated recipients and in return I also receive two back.  I love the thrill of finding out who my ATCs are from (and what part of the globe) and then a second thrill when I open the package/envelope to see what I have been sent.

November's ATC swap was "Christmas" which was quite appropriate as the season was fast approaching.  After putting on my thinking cap and with some suggestions from my friend Jenni (who also participates), the following are the ATCs that went flying across the world.


I sent three this time, one each to Canada, UK and the USA.  Each person received a card and an ATC inside a protective sleeve.


The background of each ATC was made from leftover cardstock from some Christmas cards I had been making (which also have the same background).  I started off with a mid blue sky, and some torn pieces of a lighter blue.  Once I had seen how high my hills would be, I then stamped the trees (Darkroom Door) in jet black Archival Ink, before glueing the hills into place.  I added just a touch of Distress Stickles to the tops of the hills for snow and using a white Posca pen, dotted in the stars.

The snowman is "Global Warming" from Stampotique.  I fussy cut him, coloured some highlights and arranged him and his head to fit.  His buttons are green stickles and the heart is liquid pearls.


 As you can see above, each ATC is similar but are slightly different.

The lovely girl on the card is "Holly" from Stampotique and the Merry Christmas sentiment on both the card and the sleeve is washi tape.

I'll be back very soon to show the Christmas cards I was making with the same background.
 
Happy Crafting!


Tuesday 2 December 2014

APC Challenge - Week 12

Altered Playing Card Challenge
Week 12

This weeks challenge was to use designer paper on both cards
along with the letters "I" and "W".


"I" was the beginning of the sentence "I am thankful for ......."
with "W" the beginning of "What I like about myself"

All the words on the "I" card came from a couple of word sticker sheets that were in my stash and I simply chose ones that I felt I was 'thankful' for.

The second card was much harder as the statement "what I like about myself" takes a bit of thinking about.   These words are computer generated in different fonts as none of these words were on the sticker sheets. 

I think there needs to be a little embellishment or something just to finish these two cards off, but until I figure out just what that is, they will remain as you see them.

Happy Crafting!